Caravan / boat aerial pole installations
It’s all very well having your decent caravan aerial and knowing how to get the best signal from it, but how do you install the pole that it’ll mount on ?
Permanent installations, on a boat or caravan, require a bit of thought and are outside the scope of this article but there’s a picture below of a neat method of attaching the pole to a canal boat.
Incidentally, you’re probably better not choosing white cable. It may look nice when brand new, but it’ll start showing up the dirt and then you’ll wish you’d gone for black cable !
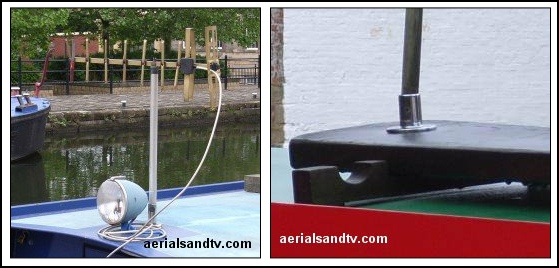
The above permanent install (above left) is nice and neat, though I can’t say I’m impressed by his (or her) choice of crappy Contract aerial though !
Now this (above right) is a good idea, you can mount the aerial in the highest spot available without drilling into your pride and joy ! I’d have thought a slightly stronger mount would be better though, e.g one of our straight loft kits, as being used on the variation of this idea below.

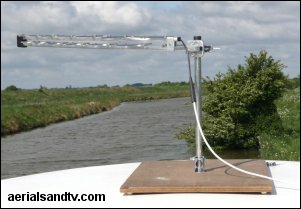
If you haven’t got a gang plank to mount your aerial on try something like this. It’s one of our straight loft kits mounted on a 20" x 35" piece of 18mm plywood. I tried it when we were on the River Great Ouse and it worked fine. It was stable enough to not blow over despite the wind requiring us to swing round on the bow then reverse off the moorings, more than once....
Make sure the feet on the corners are “grippy” type rubber, plastic ones would be more likely to just slide in any wind. Use roofing bolts to attach the loft kit to the board, because their low profile heads won’t stand too proud below and then touch the boat or caravan’s roof.
It will be noted that a 33in x 1in pole will also fit the 2 way surface bracket. Thus, when it’s not too windy, you have the option of gaining an extra 13 inches in height by using the taller pole.
Storage tip, removing the pole from the mounting (c/w aerial) takes up far less space on the boat (and ensures the aerial doesn’t get knocked off when going through a guillotine lock......). This is made easier by the use of wing nuts, see below.
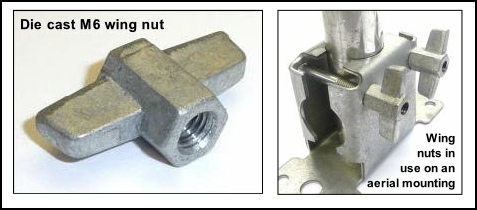
A refinement on the use of a loft kit is to replace the nuts with wing nuts, this makes it much more convenient to dismantle your aerial from its mounting without having to drag out a spanner. But we all know cheap wing nuts are prone to stripping so use decent ones ! These die cast M6 wing nuts also enable the use of a spanner to increase the torque if so desired.

A couple of contrasting contraptions.
The above one is neat and strong and it’s a reminder that simple U bolts or V bolts can sometimes suffice.
Not so sure about the one below. It may not involve drilling into the boat but it looks a bit of a mess and has one other drawback which is not immediately evident.
Any idea ?
The wooden clothes peg will eventually rot.
Bet you didn’t think of that did you ?
Lateral thinking.
That’s what won us the war.......*
* well that plus the Royal Navy and the English Channel....
Incidentally that “pole” looks suspiciously like part of an aerial cradle to me.
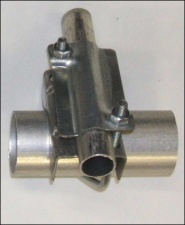
Installing a pole on a horizontal railing
If installing a vertical pole on a horizontal rail our 2x1 clamps could be considered. Even better our M8 (stainless) wing nuts fit them in order to facilitate easy removal. Unfortunately the 2x1 clamps are only available in pre galv pressings with a zinc plated V bolt, however the 2x2 clamps are available in hot dip galv and/or stainless.
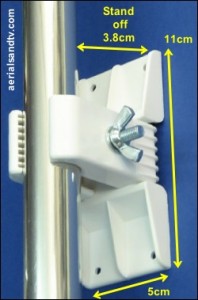
Caravan / Boat aerial pole clamp (sold here)
This is quite a neat way to attach an aerial pole to a caravan or boat. The clamps can even be stuck on using adhesive pads which is good for those who don’t want to drill into their pride and joy, though it must be admitted that bolting, screwing or riveting the bracket(s) on would be rather stronger.The use of one, two or three clamps obviously increases the strength of the installation. The clamp is for 25mm / 1” pole and therefore they are a good complement to the 4 piece caravan pole.
Some people find wrapping tape round the pole, where it is actually clamped, helps hold it more firmly when there is a strong wind about trying to realign your aerial.
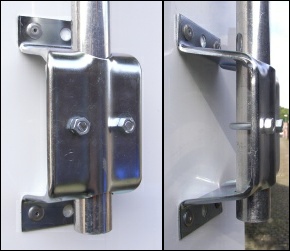
The Through Bracket (sold here) is a neat and quite strong, for a short pole anyway. Although it’s only zinc plated the plating is quite thick and the brackets have done well in our corrosion resistance tests.
These clamps only take a 1” pole (low profile wall brackets will take poles up to 2”)
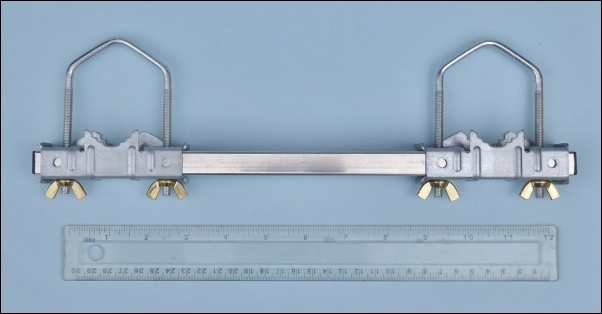
Double Clamp (sold here, and also supplied in our caravan aerial kits).
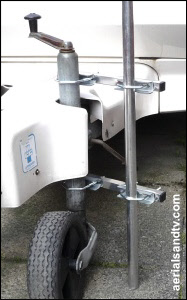
Undoubtedly the most common method of installing a caravan pole this is a neat removable way of attaching an aerial pole to another vertical tube. These are particularly well suited to bolt an aerial pole onto a caravan jockey wheel, as shown right. It is possible to use just one “double clamp” and push the bottom end of the pole into the earth, but if parked on hard standing then you need two, as is shown in the picture. Whilst it is preferable to support any aerial pole further up, bolting a 10ft caravan pole to the jockey wheel was actually a bit sturdier than I expected.

4 section (1" diameter) caravan pole (sold here and as also supplied in our caravan aerial kits).
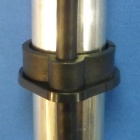
The pole has three sections at 3ft and a “shortie” top section (at 1ft) to which the aerial can be left attached, thus avoiding the chore of clamping it on each time you want to use it. If wind conditions dictate you do have the option of only using 2 or 3 of the sections giving you a shorter stronger install, because, to be frank, a 10ft x 1in pole is not heavy duty by any means.
The 4 detachable 1" clips (also available separately from the pole) can be used keep your cable tidy.
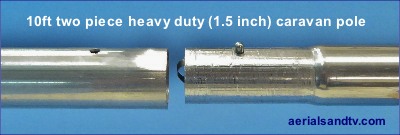
Also available is the 10ft (actually 9’ 9”) heavy duty 1.5” diameter two section caravan pole (sold here). Made up of 2 x 5ft sections this is much stronger than the 1” x 4 section model. I wouldn’t have thought it’d be that much weaker than a 10ft one piece pole.
